Wednesday, July 10, 2013

Carb free eating

Those of you who follow this (or not) might have been wondering where I've been. Bottom line....changing  the way I eat. No more carbs. I have a bad family history with carbs. Get this I LOVE carbs but they don't love me.
My mother loved carbs also as did my paternal grandmother. The combination is lethal, literally. My Hgba1c was going up. This is NOT GOOD as it means I'm getting set up for diabetes type II. so, all the bread, pasta, desserts are now out of bounds. This is the beginning of my carb free life.
That was 3 months ago. Since then....I've lost 35#. And look and feel a LOT better!
So, not that I hate pasta and the rich buttery sauces....it's like poison for me. If you want to eat georgeous food like this follow me! 
If you want to change your life like I have....join me! AND REDUCE your BMI, total weight and control you glycemic index.

Tuesday, January 01, 2013

Bagels...Something I've always wanted to try...The recipe and process

Are you intimidated by Bagels?
I WAS....they just looked like they took a long time...days even. But guess what...They're easy and DO NOT take a long time.

I sometimes order supplies for baking from King Arthur Flour. Especially the things I have trouble finding in QFC or Safeway. They always have good quality products and the 00 flour and semolina flour I use for pasta. They also have a lot of recipes posted. King Arthur Flour is the website. I was looking around and found their bagel recipe. Hmmmm, didn't look too hard and the only thing I did NOT have in the pantry was non-diastatic malt powder but it does have brown sugar as an alternative. I had about 4 hours until the News Year's Eve party....what to do....what to do?  BAGLES!
Here's the link to their recipe. But I'll recreate it here with my comments (I DID change a few things AND I have suggestions to make it better next time)

Here's the Dough (so simple!):
1 tablespoon instant yeast4 cups (17 ounces) King Arthur Unbleached Bread Flour (Yes, I used their bread flour - I can get it in the grocery store). Bread flour had a higher gluten content. Gluten is the protein that makes beautiful breads rise. Some people have gluten issues......I'm sad for you.
2 teaspoons salt1 tablespoon non-diastatic malt powder, brown sugar or barley malt syrup (like I said above...don't have non-diastatic malt powder....going to to order some today!) I used brown sugar - it was in the pantry
1 1/2 cups (12 ounces) water, lukewarm

So, I put all the warm water in a bowel and then sprinkled my active yeast on the top and then sprinkled about a teaspoon of white sugar on top of that. I LOVE to watch yeast wake up, eat and start growing. What a miracle of Biology!

In the meantime, I put all 4 cups of bread flour, brown sugar, and salt in my food processor. I have a commercial grade MagiMix...it can take the punishment. I have burned out 3 Cuisinarts doing pasta (seriously....there was smoke!). If you think yours can take it...do it. Otherwise put these dry ingredients in a bowl. You might want to hold back a cup of flour. You never know really how much fluid your flour will take. Easier to add more flour to a wet dough than add wet to a dry mix.
Add your water/yeast/sugar frothy mix to the dry ingredients and turn on your food processor or get your VERY strong mixing spoon and get to work. It's a good upper body workout if you're doing it by hand. If you have a good electric mixer...now's a good time to get it out and use it!

Mix until you can dump it out on a floured board to knead. For those of you hand mixing....the work continues! (think of the muscle tone you're developing!) 
Knead until it's a smooth ball. Oil or grease a large bowl, put in your dough, cover it, and put it in a warm place until it's risen. The KA recipe says it will take 1-1.5 hours. I must have a perfect place for bread rise....in 30-40 min it was ready.

Forming the bagels:
The formed bagels - about the size of my hand
The KA recipe says to divide into 8 equal pieces of dough. OMG!!! WAY TOO BIG! After doing this once....I'd make 12 instead of 8. They were Costco-size! You can see in the pics. If you like MASSIVE bagels, make only 8.

Anyway...Divide up your dough into balls and put on oiled parchment paper or what ever you have and cover again to puff up about 15 min. Then stick your thumb in the middle and make a bagel shape...you know with a hole in the center, stretching the dough gently without deflating the dough. Lay them back on the parchment paper to rest.

While they're puffing...get your boiling pot of water ready

Boiling water bath:
2 quarts (64 ounces) water (I used my large deep-sided skillet and filled it about 3/4 full)
2 tablespoons non-diastatic malt powder, brown sugar or barley malt syrup (again..no non-diastatic malt powder so I used brown sugar AND 1 tablespoon baking soda. The professional bakers use LYE! Whoa. I had some baking soda...good enough)
1 tablespoon granulated sugar (I'd already added brown sugar..that was enough)

Get the water bath boiling...about a medium boil. The KA recipe says to put in 4 at a time. My pan would only take 2 of these Ginormous Bagels at a time....was not a problem.
Put them in (2 at a time - make sure the water continues to boil) for 2 min on the first side (use a timer) and then flip and boil on the second side one more min. Lift them out onto the parchment paper with a wire basket spoon or other slotted spoon. Continue with the next batch.
the Bagels boiling - they puff


(Warm your oven up to 425 deg----don't forget. If you have a convection oven heat to 400 deg)

While the next batch boils, brush the tops and sides with whisked egg white with a bit of water and sprinkle with your favorite toppings. I used poppy seed, sesame seed, "everything" spice, and flaked salt.

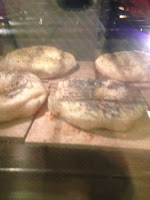
Once they're all boiled, brushed and sprinkled put them in the oven. I have ceramic tile on my bottom rack and put them on that (make sure to oil it). I used my silpat sheet on the top shelf. Bake for about 20-25 min but only as brown as you want them. Don't over bake.

Put on a rack to cool when you take them out.

Baking on my tile
OMG...they smelled soooo good. It was all I could do to not eat them as they came out of the oven. I took out some cream cheese to warm to room temp while they were baking. (NEVER eat cold cheese! EVER...why bother?)


Wayne and I each had one before we went to the NYE party and then again with breakfast this morning - split and toasted. They are HUGE, but sooo good. Good thing I walked 3 miles before breakfast this morning. 

Baked, cooled and ready to eat

Like I said, I'll make them smaller next time. Other than getting and using the non-diastatic malt powder....I'll make them exactly the same way as above. I have to ask myself...WHY did I wait so long to make them????

Right now, I've got some beef bones with yummy marrow browning in the oven with bacon lardons, onion and carrots (400 deg). This is for the beef stock I'll be using for my "Refrigerator/Stone soup" tonight for New Years Day. TIME TO CLEAN OUT THE REFRIGERATOR and have a couple of bagels with it along with a fennel/carrot slaw. 

Sunday, December 30, 2012

M is for MOZZARELLA! Fresh, home made, delectable, creamy, easy,mozzarella.

It's time to make cheese. Pure, clean flavor of homemade mozzarella is a revelation, as is the cheese’s tender, almost flaky, pull-apart texture. Time, patience, detail and cleanliness are the keys.
Creamy, soft, and hand made. You can't buy better

The Recipe:
1 gallon whole milk...it's OK to replace a cup of milk with a cup of cream. Yummy! Just make sure you don't get Hyper- homogenized cream. Same with the milk. It will cause problems with curd formation.
1 1/8 teaspoon citric acid divided. 1/2 is dissolved in water and the other one is sprinkled directly into the milk. (The citric acid is what gives the cheese it's stretch
1/4 tablet rennet, crushed (where do you get this? Try a health food store. Online is easy)
1/4 cup warm water

EQUIPMENT: cheesecloth; kitchen string
Heat milk and citric acid to 88°F in a 7- to 8-qt heavy pot over low heat, stirring occasionally, then maintain a temperature of 88 to 91°F on an instant-read thermometer, returning to and removing from heat as necessary, for 1 hour. (Mixture will begin to curdle.)

Dissolve rennet in warm water, then stir into milk mixture. Let stand, uncovered, maintaining 88 to 91°F, until the consistency of soft pudding, 15 to 20 minutes.

Using a long knife, make cuts across stiffened milk mixture at 1/2-inch intervals, reaching down to bottom of pot, then make similar cuts in stiffened milk mixture to form a crosshatch pattern (small squares) on top. Let stand, undisturbed, 5 minutes. Keeping temperature between 88 and 91°F (reheat when necessary over very low heat), gently stir curds every 10 minutes for 30 minutes, then let curds stand, uncovered and undisturbed, maintaining temperature, 30 minutes more.

Line a large sieve with cheesecloth and set over a bowl. Using a ladle or slotted spoon, transfer curds to center of cheesecloth. Don't just dump the curds into the sieve. Pull sides up over curds to form a sack and tie sides together with a long piece of string as close to curds as possible but without squeezing curds. Suspend sack from a knob or cupboard handle, using string, at least 4 inches from bottom of bowl (sack should not sit in any whey that accumulates; if necessary, discard whey as it accumulates). Let hang 3 hours at room temperature.

Heat a large pot of heavily salted water (1/3 cup salt for 5 qt water) to 170°F. Place one fourth of the curds in a shallow bowl, then ladle about 6 cups hot water over curds and let stand until curds start to meld together, about 2 minutes. Gather curds together with a slotted spoon and remove from water. Working over the bowl of hot water, gently fold the mass of curds over itself in your hands, stretching as you fold. Reheat in hot water as necessary (3 to 5 times) to maintain temperature, folding and stretching until curds become a smooth and elastic disk. I wear a pair of food service gloves for this step. The water is pretty hot.

Form into a ball by tucking outside into center, then pinch edges together. Place mozzarella in cool water to cool completely before eating. Make the rest of the cheese the same way, reusing hot salted water for subsequent batches.
NOTES:
Curds can be made and drained in cheesecloth (3 hours) 1 day ahead, then chilled in a sealable bag.
Mozzarella is best the day it is made but can be kept, covered with water, in refrigerator up to 5 days. Bring to room temperature before serving. Just a side note...cheese is ALWAYS BETTER AT ROOM TEMP.

Don't throw the whey out! Use it to make bread. It really WILL be awesome bread.

The New England Cheesemaking Supply Company has a starter kit. Which I bought and love. You only need to buy the kit once. It’s great and makes more +/- 40 pounds of cheese, and you get everything in the kit but your milk. The kit tells you all the different kinds of milk you can use. The kit is called: 30 Minute Mozzarella & Ricotta Kit.

ENJOY!

Sunday, December 23, 2012

Sous Vide......my new toy..I mean tool

Sous vide = cooking in a warm/hot water bath. Thomas Keller does a LOT of it. And that most perfect steak you had in the very expensive restaurant was probably cooked sous vide and then seared to order at the last second. The original sous vide instrument was in a lab. Not a cooking lab, a chemistry and biology lab. I've used them myself. The way you COOK with it is to vacuum seal the food with all kinds of spices/oil/flavors and then drop the bag into the hot water bath. Then let it sit...sometimes 30-40 min and sometimes hours.

I've jury rigged this technique using a pan on the stove, a slow cooker, and a wok with the food sealed in a zip-lock bag. Not bad but not the best. I've yearned for one of the REAL sous vide "water ovens".


The new Sous Vide Supreme
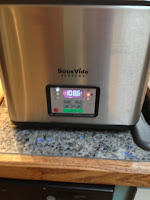
Wait, wait....while surfing one day I see there is now a less-than-$1000.00 home model. OMG.....how much!? $429.00 with free shipping and no tax (which added up to about $100). Sous Vide Supreme http://www.sousvidesupreme.com/default.aspx  Using a rescent bonus...I went ahead and ordered it. Actually I held my breath...and clicked "add to cart". And then got our my credit card.

the inside, lots of room
close up of the control panel
the chicken breasts, stuffed and ready to go


It arrived about 5 days later. I un-boxed it, read the directions, filled it with water and plugged it in. I took 2 chicken breasts out of the freezer and defrosted them.

The chicken breasts, cooked, browned, with mozzarella
Split the breast, stuffed them with garlic, bacon, salt, and pepper and then added a dollop of butter into the vacuum bag and sealed it.

After cooking sous vide for 2 hours (I took a nap), Wayne got home hungry as usual "becuase he forgot to eat lunch"....really?* sigh, never been a problem I've had.

So made a pot of rice, added a green salad. I then took the breasts out of the water oven....their term...not mine. I like my meat seared so I heated my cast iron skillet hot with vegetable oil and browned them. After turning to the second side it added a slice of my own mozzarella and watched it melt. Split some small tomatoes, added them to the pan then plated everything.

Wayne usually does NOT finish his dinner. He saves what's left for lunch tomorrow. He ate the whole breast! Guess he WAS pretty hungry.

The first sous vide meal was a roaring success. Get ready for MORE sous vide postings.

Tuesday, December 18, 2012

Pulled Pork......pre-delicious

A wise Hawaiian cook has said that "the Pig is the only animal that comes pre-delicious"
What's THAT mean?
What it means is that pork needs NOTHING to make it perfect. It has everything it needs to taste wonderful. Anything we add.....is just additive. Either through the cooking method or spices, it's just additive.
Given that....I bought a 2# pork shoulder butt roast, rubbed it with red Hawaiian salt and liquid smoke. Then wrapped it in banana leaves and put it in the crock pot before we left for work. BANANA????? Yes, apparently it gives the meat a "grassy taste" reminiscent of luau pork baked in a ground oven. Picked up frozen banana leaves at an Asian market. (Wow....banana leaves are BIG!)
How did it turn out?
OMG......the whole house smelled delicious! Pulled out the pork and unwrapped it. Sooo nice! Tender, flavorful, and not much fat left on the meat. I "pulled" the pork apart with two forks and poured off the juices letting the fat to separate. Poured this off and then added the leftover juices to the meat. Final weight of meat....1.3#. About 60% left over.

Added sides were rice, green salad (with pickled onions), and a finely cut coleslaw with vinegar/soy/sesame oil dressing. I also made a sauted onion smokey BBQ sauce. Ahhhhh.
We barely put a dent in this meat for the first meal. Leftovers for the next day.

Stir fry with Vegies for day 3, home made pasta and the pork for day 4, and finally.....BBQ pork pizza to polish it off. Wayne took leftovers to work every day. We got a lot of mileage from 2# of pork! The original roast cost $6 or so.
I forgot to take pictures until the last day with the pizza. DOH!

Sunday, November 18, 2012

French Bread Baguettes at Home

The tale of French Baguettes goes like this....

I got home last night around 11:00. I was scheduled to get home earlier but there was mechanical problems and we had to turn around and change planes. Ahhhh the joys of traveling.

Since I'd planned to make some fresh bread to take along to Joe and Sarah's today...I didn't want to NOT MAKE THE BREAD. THAT would be a real tragedy!
The good news....this recipe starts the night before! You can DO IT!

The night before: dissolve 1 tablespoon or so of yeast in warm water. Add a bit of sugar. The yeast needs a bit of food to get started.
Once the yeast wakes up, add about a cup or more of warm water (I always use more...I like making a lot of bread. We use it throughout the week) a table spoon of olive oil, a teaspoon of salt, and a cup of flour. Mix well, cover, set aside to let the magic of yeast happen. This is called a sponge. About an hour. I got in the hot tub to ease the stress of travel out of my body. A glass or two of wine helped.

After drying off....
Add enough flour to make a raggy dough. WHAT?..... You ask? Just a wet dough. How much flour? Depends on how much water you used. This is bread....enjoy yourself! No kneading yet. Leave it in the bowl. Cover it again. Let it rest and again let yeasty magic happen. About 30-60 min depending on how warm your kitchen is. I have a proofing setting on my oven and used that. 30 min. Was enough.
Last step tonight....stick this bowl of dough in the refrigerator and GO TO BED.

Next morning while you're making coffee. Take the bowl of dough out of the refrigerator and take the four edges of the dough, pull it up and fold into the center, punching it down. Turn the dough out onto a floured board and flour it just enough so that its not sticky. Knead, just a bit. Remember...this is EASY bread.

Cut lengths of dough into long bits, about 2 inches in diameter. Turn this into itself pinching the edge along the length. Roll it and then place in on a bread cloth. WHAT? You don't have a special linen bread cloth? OK, MAKE ONE! If you have a linen dish cloth use that. If not.... A nice flour sack-type towel will work just fine.

A WORD ABOUT BREAD CLOTHS....
Take your towel and work flour into it trying to get the flour worked between the weave of the towel. Work more flour into it and then spread it out. Sprinkle more flour onto the towel. NEVER EVER WASH THIS BREAD TOWEL EVER AGAIN. This is your bread towel for crying out loud! After using it.....take it outside and shake it. If its damp from your bread simply hang it to dry and then fold it and put it away until you use it to bake bread again. Next time...work more flour into it before placing your bread on it. Every time after your bread towel just gets better. Your dough will NOT stick and you will be able to make the most beautiful Baguettes. PRICELESS. The first time you use it...prepare for sticking. Don't worry, gently pull your dough away. The dough might deflate a bit. Not a problem....it will still taste great.
My bread towel is linen...linen is the best. If you can, get one and use it. They're available from any good cooking store but Amazon has them to order online. But most people don't have linen towels laying around. Cotton will work for now.

Back to the bread.....
Take this long roll of dough and place it on your floured bread cloth. Make the next roll of dough. Pinch the cloth up to make a ridge of cloth between the two rolls of dough. Do this for each roll of dough until your out of dough. (See pic) Now, cover your nice little nestled rolls and let the magic of yeast happen. Let them rise in a warm place until doubled.

These are my baguettes in my linen bread cloth

Now is a good time to make breakfast. While you're making and eating breakfast...the yeast in your bread is hard at work making your dough rise
Ahhhhh, the bread ready for baking

Now....for the baking.
If you have a wood fired oven....you are lucky! If not...make one next summer. I did and LOVE IT! See previous posts for info.

If you have a regular oven you can imitate a brick oven by buying and placing tiles on your oven rack. YES.... straight from Lowes or Home Depot....no need for special anything. I use them and they work great!

If you don't have tile laying around...a baking sheet will work just fine....but really...next time you go to your favorite hardware store buy about 8 4x4 inch terracotta tiles. They'll cost less than $10 and are a LOT cheaper than buying a stone baking sheet.

Preheat your oven to 425 deg. Yeah...hot! Once it's ready. Gently turn your beautiful dough onto a baking sheet, sift some flour on top and slash your unbanked baguettes (see pic) Why? This gives the bread room to rise FAST. PLUS it gives them that distinctive French bread look! They're baguettes, remember!
At this stage you can brush them with cream or an egg mix and sprinkle shaved salt, poppy seeds, or sesame seeds. Depending on your taste. I'm doing two naked and two with shaved sea salt.
Depending on how big they are you can put all in at the same time or stage them. If you have the tile, you can put them right on the tile...no baking sheet needed. Put your bread in the oven and spray the oven with water. It creates instant steam. Why? This allows the bread to rise VERY FAST and makes a beautiful crust. After about 5 min. Open the oven STAND BACK....THE STEAM WILL BURN YOUR FACE and spray it again. If you don't have a sprayer (this time) take about 1/8 cup of water and fling it into your oven. Quickly close the door! Let it bake until nice and golden brown. About 20 min but it depends on the size of your loaves.

Take them out and let them cool before slicing and eating. This is the hardest part....seriously. Wait as long as you can. Slice on an angle.....and eat. Butter, jam, honey.....who cares its all good!
Watch the faces of your family and friends when they eat it.....PRICELESS.

Finished baguettes - these are the two loaves with shaved salt


Friday, November 02, 2012

MASCAPONE and bread

I had to stay home yesterday. A bit of food poisoning....yuk. I won't say where I had lunch but in just under two hours....all hell broke loose. Literally. If you've ever watched a horror movie you get the idea. By yesterday morning I was better but very tired. Sleep, only sleep helps and home food. I vow to only eat my own food.... Ever again.
By the afternoon I was feeling a whole bunch better and cleaned out my refrigerator. Hmmmmm, the 1/2 gallon of milk was close to out dating and we were out of bread. What to dooo, what to doooo?
Make CHEESE AND BREAD! For those of you concerned that I shouldn't have been handling food.... I was all over the food poisoning , diligently washed my hands and everything else....and not infectious. FORWARD!
For mascapone:
1/2 gal whole milk
1 C cream (not really necessary but SO GOOD)
1/8 or so cup of lemon juice
1/4 C buttermilk (I used what was left in the carton)
Put the milk products in a large pot over medium heat. Heat the milk until it steams and there is a ring of bubbles around the edge of the pot. Do not boil. Turn off the heat and stir in the lemon juice. Not every lemon has the same amount of acid. If after 30 min the curds don't appear add some more.
The milk will separate into curds (the milk solids) and whey (the liquid part). Cheese is made from the curds.
Line a wire colander with two layers of cheese cloth. Don't have cheese cloth? Use two layers of strong paper towels. Not as good... But use what you have, right?
Scoop the curds into the colander and at the end gently pour everything left into the colander. Make sure the curds are elevated above the whey while draining.
Now the hard part....waiting. I started mine around 5pm. By 11pm I was able to change out the cheese cloth to a layer of paper towels. This allowed me to dry the curds even faster as the towels soaked up more whey. I let this sit on the counter over night.
This morning....mmmmm, mascapone! (See pic). The buttermilk gives it a nice tangy flavor, perfect for a tiramisu.
Another way to make this.... Use home made yogurt, put THAT in a colander and by morning.... Cheese! So easy.